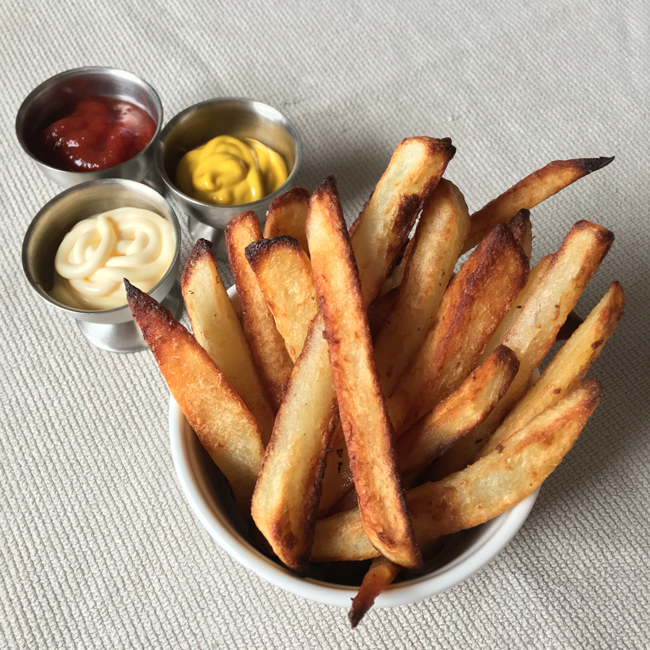
The wind is a’ changin’ and with it comes new schedules to go with the weather. Seems like the perfect time to review some dinners that are done in 15 minutes or less — you know, the kind that may leverage a jarred sauce or spice mix for a super short grocery list. Serve some mixed greens or shredded cabbage on the side and your crazy fast dinner is ready.
[hr]
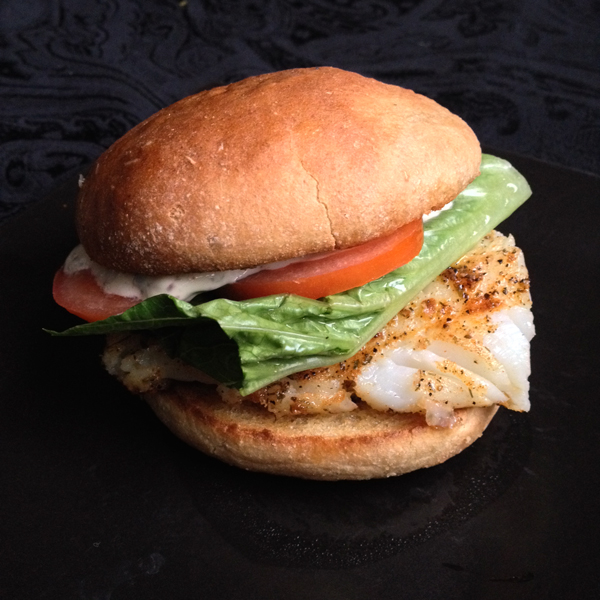
Fish Sandwiches
[threecol_one]You’ll Need
Skinless boneless cod (about 4 ounces per person)
Old Bay or other fish seasoning
Hamburger Buns
Remoulade or Tarter Sauce
Toppings like tomatoes and lettuce
[/threecol_one][threecol_two_last]To Make
Heat some oil in a non-stick pan. Lightly oil the fish then rub the seasoning all over it (sprinkle with salt if there isn’t any in the seasoning). When hot, add the fish and cook until it is opaque about 2/3rds up, then flip the fish and cook the other side. Meanwhile, butter the insides of the buns and toast or broil them until light brown. Layer the bottom of the bun with lettuce, tomato, and the cooked fish. Spread remoulade on the top bun and top the sandwich. [/threecol_two_last]
Potstickers with Sauce
[threecol_one]You’ll Need
Frozen potstickers
Soy Sauce
Chili Sauce
Chinese Hot Mustard*
[/threecol_one][threecol_two_last]To Make
Steam the potstickers as directed on the package. Meanwhile, whisk together equal amounts of soy sauce, chili sauce and mustard together. Dip the potstickers in the sauce before eating.
*Regular mustard works, too. Chinese-style is just better.[/threecol_two_last]
Chinese Dumpling Soup
[threecol_one]You’ll Need
Frozen potstickers
Chicken broth
Spinach
[/threecol_one][threecol_two_last]To Make
Boil the potstickers in the chicken broth. When the potstickers are cooked through, the soup is done. Add the spinach to the hot soup just before serving. [/threecol_two_last]
Mushroom & Broccoli Alfredo
[threecol_one]You’ll Need
Jar of alfredo sauce
Linguine noodles
8 ounces sliced mushrooms and/or one crown broccoli, broken into florets
Optional: One chicken breast, sliced thinly
[/threecol_one][threecol_two_last]To Make
Warm up the alfredo sauce in a small saucepan while you are boiling the noodles. (If you are using sliced chicken, add it to the sauce to cook it.) Drain the noodles when they are done, and return to the warm pan and cover with lid. In a saucepan, heat some butter and add the veggies and cook until the mushrooms are softened and juicy. Combine with the sauce and stir, then add to pot with noodles and coat to stir.[/threecol_two_last]
Egg Sandwiches with Mixed Greens
[threecol_one]You’ll Need
English muffins
Gruyère cheese, sliced
One egg per person
Mixed greens
Optional: Cooked ham
[/threecol_one][threecol_two_last]To Make
Heat some oil in a frying pan over medium heat. Meanwhile, open the English muffins and toast them in a toaster oven. Crack the eggs into the pan and fry sunny-side up until the bottoms are set. Flip the eggs, top with Gruyère cheese, sprinkle with some salt and pepper and cook for another couple of minutes until the cheese is melty. Butter the insides of the English muffin and place the egg with cheese inside. (If using ham, add under egg.) Grind some black pepper and top with lid and serve with mixed greens on the side.[/threecol_two_last]
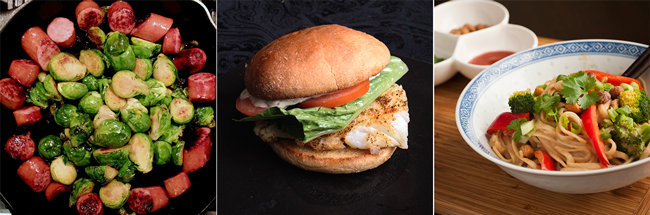
Polish Sausage and Veggies
[threecol_one]You’ll Need
Polish sausage
Veggies to your liking — like halved Brussels sprouts or thinly sliced onions and red pepper
Dinner rolls
[/threecol_one][threecol_two_last]To Make
Heat a very large fry pan over medium-high heat. Slice the Polish sausage into 1/2-inch to 2-inch slices. Add to the pan and begin to fry them. When the fat begins to render, push the sausage to one side to continue cooking and add the veggies to the pan. Cook until the veggies are bright and tender, about 5 minutes. Serve with dinner rolls or mashed potatoes.[/threecol_two_last]
Peanut Soba Noodles with Veggies and Egg
[threecol_one]You’ll Need
One jar of Asian peanut sauce
Mixed veggies, like red pepper, broccoli, snap peas, etc. — cut into bite-sized pieces
Soba or rice noodles
One egg per person
Roasted peanuts (optional)
Hot sauce (optional)
[/threecol_one][threecol_two_last]To Make
Boil the noodles according to the package instructions. Meanwhile, heat some oil in a large fry pan. Add the veggies and stir fry until they are bright and tender, about 5 minutes, then remove from heat. Cook the egg how you’d like: either scrambled or sunny side up. When the noodles are drained, return them to the pot. Add the peanut sauce and veggies, and stir to combine. Add in scrambled egg, too, otherwise top the bowls with the sunny-side up egg. Serve topped with chopped peanuts and hot sauce.[/threecol_two_last]
Cheesy Pasta
[threecol_one]You’ll Need
Pasta, any kind
Any cheese like cheddar, mozzarella, blue cheese, etc. (Get creative, use several!)
Mixed greens
Optional: Cooked hot dog or shrimp, chopped
[/threecol_one][threecol_two_last]To Make
Boil the noodles as directed in the recipe, in salted water. (If using hot dogs or shrimp, cook in the boiling water, then chop.) Grate any firm or semi-firm cheeses. Set a mug or measuring cup next to the colander in the sink and fill with pasta water before drain the noodles. Add the noodles back to the warm pan and add the cheese(s). Stir, adding reserved pasta water to thin the sauce, until smooth. (Fold in chopped hot dog or shrimp, if using.) Serve with mixed greens on the side.[/threecol_two_last]
Tomato-Mozzarella Open-Faced Bagels
[threecol_one]You’ll Need
Bagels
Fresh Mozzarella
Basil
Tomato
Olive oil
[/threecol_one][threecol_two_last]To Make
Slice the bagels into halves. Layer each slice with mozzarella, a slice of tomato, and a leaf of basil. Place on a foil-lined pan and drizzle with olive oil and sprinkle with coarse salt. Toast or broil for several minutes, until the mozzarella is melting. Let cool for a minute before eating.[/threecol_two_last]
Spicy Ramen with Egg
[threecol_one]You’ll Need
One package of spicy ramen*
One egg per person
Veggies to your liking — like oriental mushrooms, scallions, or spinach — chopped
[/threecol_one][threecol_two_last]To Make
Begin to cook the noodles according to package instructions. When the noodles start to soften and you can tease them apart, crack the eggs into the pot, so the noodles create a cushion for the egg. Add any vegetables and cook until the noodles are a firm al dente. Remove from heat and let the noodles continue cooking while the soup cools for about five minutes. Divide between bowls.
*I like the Shin Ramyun Hot Spicy Noodle in the large, red and black package. Available at most grocery stores with a respectable ethnic section.[/threecol_two_last]
Butternut Squash and Basil Gnocchi
[threecol_one]You’ll Need
Gnocchi, frozen or dried
Butternut squash, frozen, cubed
Basil leaves, sliced thinly
Butter
Optional: Mild Italian sausage
[/threecol_one][threecol_two_last]To Make
Cook the gnocchi according to the package instructions, then drain and return to warm pan and cover with lid. In a large non-stick frying pan, heat up some butter and cook the butternut squash until it is cooked through. (If using sausage, open the casing and cook in the same pan, breaking it apart with a spoon until it is cooked through. Add the gnocchi to the pan and toss gently until the gnocchi is coated, adding olive oil if needed. Sprinkle with basil, coarse salt and freshly ground black pepper before serving.[/threecol_two_last]
[fblike][fbshare][twitter][twitter_follow username=”eatgoodathome”]