

Posted on

The Golden Egg

I’ve got a new obsession, and it is perfecting the soft-cooked egg. Recipes with bright, sunny yolks beckon me — noodle bowls, breakfasts, tagines, you name it. Top just about anything with a soft-cooked egg and I’m interested.

They require a knack for timing. Too little time, and you have undercooked whites. Too long, and the yolk hardens. The goal is that magical middle ground: whites that are completely cooked, with a silky yolk that spills out in golden decadence when you break into it.

This is the number one trick I’ve learned: use the timer. A loud one.

I wasn’t raised with soft-cooked eggs. In fact, I only ate scrambled eggs until a couple years ago. I was so picky as a kid that I would only eat scrambled eggs prepared by my Tata or Baba! (Much to the irritation of every other adult who ever served me eggs.) But that’s another story.

I’ve since discovered that different soft-cooked eggs serve different purposes. Soft-boiled eggs are beautiful when presentation matters, though peeling them can be a little tricky. When the goal is to smash the egg into the rest of the dish, a poached egg is often the better bet. Soft-baked eggs are forgiving when you need a little extra time to get everything else ready. And sunny-side up? That’s what I want when there’s toast on the plate waiting to be dipped.

Fresh eggs matter, too. Really, nothing beats a farm-fresh egg. I love opening a carton and seeing different colors from different breeds of chickens. Fresh eggs tend to have firmer whites, and there’s something especially wonderful about that bright yolk. Eggs are one food where I’ll gladly spend a little more to support hens that are well cared for.
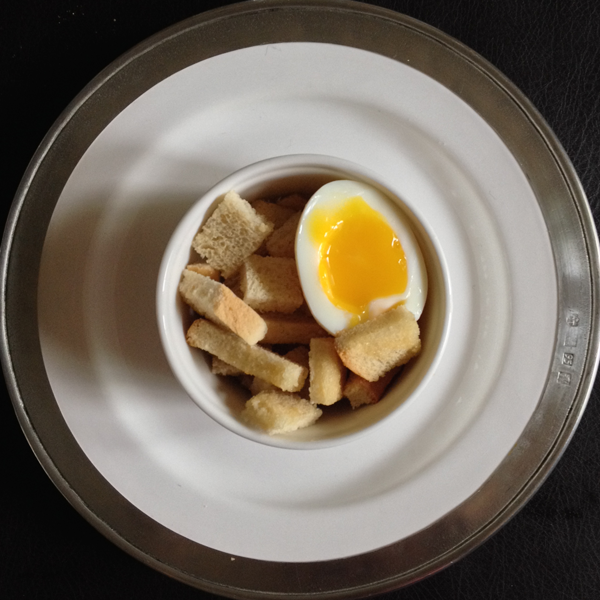
Soft-boiled egg with a runny yolk

Soft-Boiled Eggs

Goal: Perfectly shaped egg, runny yolk

Bring a pot of water to a rolling boil. Have a bowl of ice water ready to go.

Thumbtack piercing the wide end of an egg

For a rounder finished egg

The air pocket at the wide end of an egg can leave a flat spot after cooking. I prick a tiny hole in the wide end with a clean thumbtack before lowering the egg into the water. This gives the expanding air an escape route, helping the cooked egg fill out into a smoother, rounder shape.

Note: The American Egg Board recommends against piercing eggs before cooking because a nonsterile pin can introduce bacteria and piercing can create tiny cracks in the shell.

Using a pasta scoop or ladle, gently lower the egg into the boiling water. Boil for exactly 6 minutes, then remove it from the pot and place it in the ice bath for about a minute.

Begin tapping the egg gently on the top or bottom first. If you start on the side, the delicate egg can break in half. Continue tapping all the way around until the shell is fragmented into tiny pieces, then peel gently.

Poached egg with a runny yolk

Poached Eggs

Goal: Smooth, coagulated whites, runny yolk

Poached eggs are great when the egg doesn’t need to look absolutely perfect — especially when it’s going under a sauce or getting smashed into the rest of the dish.

Fill a wide nonstick pan with about 1½ inches of water and add 2 teaspoons of white vinegar. Bring the water to a gentle simmer. Crack each egg into a small bowl.

Carefully lower each egg into the water, keeping the white as close to the yolk as possible. Simmer for about 5 minutes, then remove with a slotted spoon. Trim away any wispy whites if you’d like a prettier finished egg.

Soft-baked egg with toast

Soft-Baked Eggs

Goal: Whites set, runny yolk

Preheat the oven or toaster oven to 375°F. If you’re baking the eggs by themselves, butter individual ramekins and set them on a baking sheet.

You can also bake the ramekins in a water bath by placing them in a larger baking dish partially filled with hot water. Be careful not to let water splash into the ramekins.

If you’re baking the eggs directly into another prepared dish, make little wells for them to settle into. Crack in the eggs and bake for 12–15 minutes. Keep a close eye on them near the end — the perfect window between set white and runny yolk is a small one.
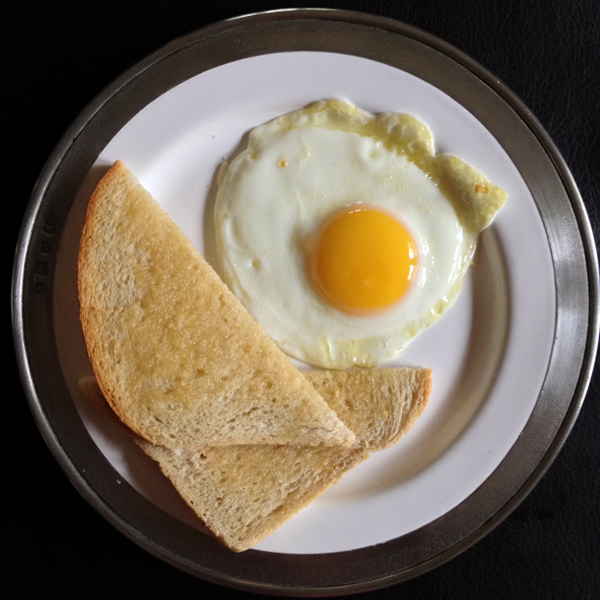
Sunny-side up egg with toast

Sunny-Side Up Eggs

Goal: Whites set, no browned edges, runny yolk

Heat a thin layer of oil in a nonstick pan over medium heat. We’re going for a slow cook, so don’t let the pan or oil get smoking hot.

Add the eggs with enough room that they don’t run into each other. Begin spooning a little hot oil over the whites only. After a minute or two, when the whites are no longer clear or jiggly, spoon a little oil over the yolks just to set the surface.

Slide the eggs from the pan onto a paper towel, then transfer them to the plate with a spatula.

NOW, WHAT’S FOR DINNER?

Put a good egg on something delicious.

Homegrown Foods delivers fresh, locally sourced meal kits from our Minneapolis kitchen straight to your door. See what’s cooking over the next few weeks.


What’s on the Menu

Posted on

It’s Not Beans To Me: Canning the Canned Bean

Oh, you little beans…tiny little buds. So good, yet so disdained. Here is one thing I know about beans: most people use canned. In fact, I daresay most people think it’s a complete and utter waste of time to cook dried beans.

As I softly boiled turtle beans for Blackened Corn Quesadillas (I needed the photo for an upcoming recipe on our menu), I wondered if people would genuinely be annoyed that I am making them boil beans from scratch. But one bite of the finished product convinced me that it’s worth the nominal effort.

So I feel I need to set the record straight. Here is why cooking dried beans is better than canned, and easier than you think:

1. Forget about overnight soaking. Trying to remember to soak beans the night before is a joke. I’d need to set a reminder on my phone if I’m expected to remember something like that. Despite common beliefs, you can soak them in the fridge for a good five days or so.* Mainly, you don’t want them in there so long they sprout. Otherwise, if you know you need them that week, throw the bowl (of beans covered with water) in the fridge and they’ll be good and soaked when you are ready to use them.

2. Amp the flavor with seasoning. When you soak and cook your own beans, you can add all kinds of wonderful seasoning to enhance the flavor. I am a fan of boiling beans with avocado leaf and coriander seeds in South American dishes. You can boil in flavorful broths like chicken, mushroom, beef, or vegetable. Or throw in some chili peppers so the beans lend a light heat to the dish. Get creative.

3. Say no to mush. Canned beans are soft to begin with. Forget about simmering canned beans in a slow cooker, they will disintegrate. Cooking your own beans lets you incorporate them into the dish in a way that canned can’t compete.

4. Running out of gas. Ah, the question of flatulence. Do beans make you gassy? Does preparing them this way or that affect how gassy they make you? There are tons of opinions on the topic. I read somewhere that adding kombu (dried seaweed) while soaking and cooking the beans increases digestability, and have to agree that there have been no smelly incidences since. I was a little worried that the beans would taste like seaweed, but after they are boiled they just taste like beans. Discard the kombu when the beans are done.

…and the final debate, the argument of time…

5. Bean time = prep time + cook time. The fact that I cook at home very frequently probably makes me a faster prep than many, but I am no Iron Chef. I have found — recipe after recipe — that if I get the beans boiling on the stove before I begin washing and chopping the other ingredients, they are done cooking by the time they are needed in the recipe.

So there. Maybe I can convince one person that recipes asking you to cook your own beans are not evil. That you should put down the can and head to the bulk section and revel in the new era of flavorful, digestible and easy to cook beans.

*Don’t leave soaked beans out on the countertop more than 10 hours or so. That’s not good. The water will spoil and they will probably start to sprout after two days. Even if you want to intentionally sprout your beans — which is very healthy and a great addition to salads, by the way! — you need to change the water frequently.

Posted on

A New Grocery Delivery for the Twin Cities

I bring you Homegrown Foods, a novel meal planning and grocery delivery service in the Twin Cities where foodie meets kid-friendly. This business is an effort to make cooking incredible meals fun and easy. To take the stress off of our collective plates, and bring some inspiration and fun to preparing dinner. As a mom of three small children (4, 2-1/2, and 6 months), I know how hard it is to put dinner on the table. But we’ve been recipe-testing for over a year and let me tell you, we’ve been eating goooooood.

Well folks, now all the paperwork is in order and we are ready for you.

This business started over a year ago when I first heard about the idea from my brother-in-law, who lives in Sweden. He and his girlfriend were trying the service Linas Matkasse (there are several there, Middagsfrid was the original) where customers sign up, then enjoy regular delivery of preportioned groceries for specific recipes. This conversation was on the heels of all the moms discussing the woes of figuring out what to make, going to the store, figuring out what goes with what, and how they just want to give up. Like every other mom, more than once I have lamented, “Why do I even bother?!” Except I love to cook and that is what keeps me going.

Like, I really love to cook…I’ll take cooking over cleaning any day (cleaning makes me grumpy). So when I heard the idea I thought, wow, that is a great service. Too bad nobody is doing anything like that here. I’d love to not have to worry about what next week’s menu is. With three small kids, it’d be a blessing to get to pass on grocery shopping half the time. Somebody should do that idea… I should do that idea!

And so here we are, offering to make grocery deliveries containing four dinner kits for $8 per person. The cornerstone of Homegrown Foods is great recipes and great ingredients. I am sort of a snob when it comes to ingredients. If there wasn’t love put into producing that food item, I probably am not going to love it back. I’m gonna make sure you love your groceries. I want to bring you ingredients as if I was shopping for my own family, getting them from local, organic, artisinal producers as often as I can. Also, I am a stickler for authentic ingredients. Be it kaffir lime leaves or chorizo, you will need to substitute (or do without) no more.

Each menu is composed of four dinners: a poultry, meat, vegetarian and seafood dish. If you are a couple, this should cover you for at least a week. If you are a family of four or five, about a week. (If you are six or more, you may want to have some extra grains or lettuce mix on-hand.) The menu changes every other week to take advantage of seasonally delicious ingredients.

The recipes are from a variety of sources and are only included on the roster if they are amazing and relatively fool-proof. I dislike recipes where if one component is off, the whole dish fails. I’ve also taken the time to provide several cooking methods. Because we live in Minnesota. That means we grill in the summer and run the oven (or slow-cooker) in the winter. These recipes produce dishes that’ll make the neighbors’ noses itch with envy. I guess that is my litmus test: the kitchen should smell divine and everyone come running to the table for dinner.

– Aleks Till

Posted on

Homegrown Foods … Coming soon!

Here at Homegrown Foods, we are working intently … getting all the details sorted out to ensure the best customer experience possible before launching. Double-checking recipes (finding some new ones, too), ordering supplies, and writing some crazy code so the website is all that and more.

We hope to be able to take orders Spring 2014 and get this business cookin’!